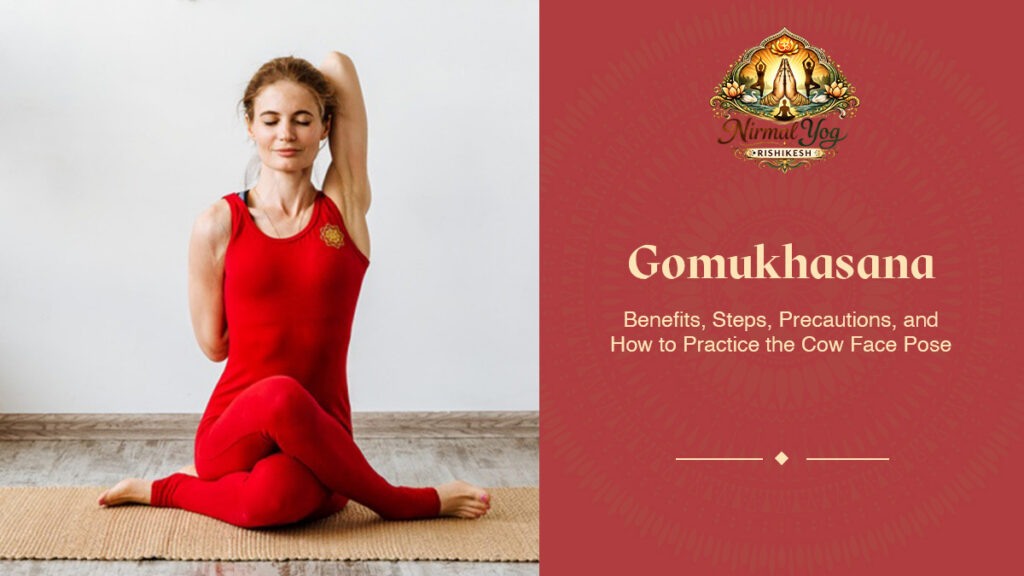
If you sit at a desk a lot, or drive, or work on your phone, or just carry tension in your shoulders, you might find your hips and upper body getting stiff. This is where yoga can really help, and Gomukhasana is a great pose to try. Gomukhasana, or Cow Face Pose, is a seated yoga pose that beautifully blends a deep hip stretch with an opening of the shoulders and chest. It can look complicated when you first see it, especially if you try to put your hands together behind your back.
But with patience and the right modifications, it can become a surprisingly comfortable and calming part of your practice. The name itself comes from Sanskrit. “Gow” means “cow,” “Mukha” means “head” or “mouth,” and “Asana” means “pose.” Gomukhasana is the cow face pose. In combination, in yoga it is traditionally taught that gomukhasana should be performed seated and bound. It emphasizes the hips, thighs, shoulders, chest, and knees, promoting awareness and relaxation.
What Is Gomukhasana?
Gomukhasana yoga is a seated posture in which the legs are crossed and stacked while the arms are positioned in opposite directions behind the back. The goal is to create an even, steady posture rather than forcing the body into a particular shape. The pose is traditionally associated with physical awareness around the hips, thighs, shoulders, chest, and knees. It is also described as supporting awareness of the Ajna and Anahata chakras. From an Ayurvedic perspective, Gomukhasana is considered particularly suitable for Vata. One of the most appealing things about this pose is that it works on several areas at once. Your lower body gets a stretch while your upper body opens, making it a useful addition to a balanced yoga routine.
How to Do Gomukhasana
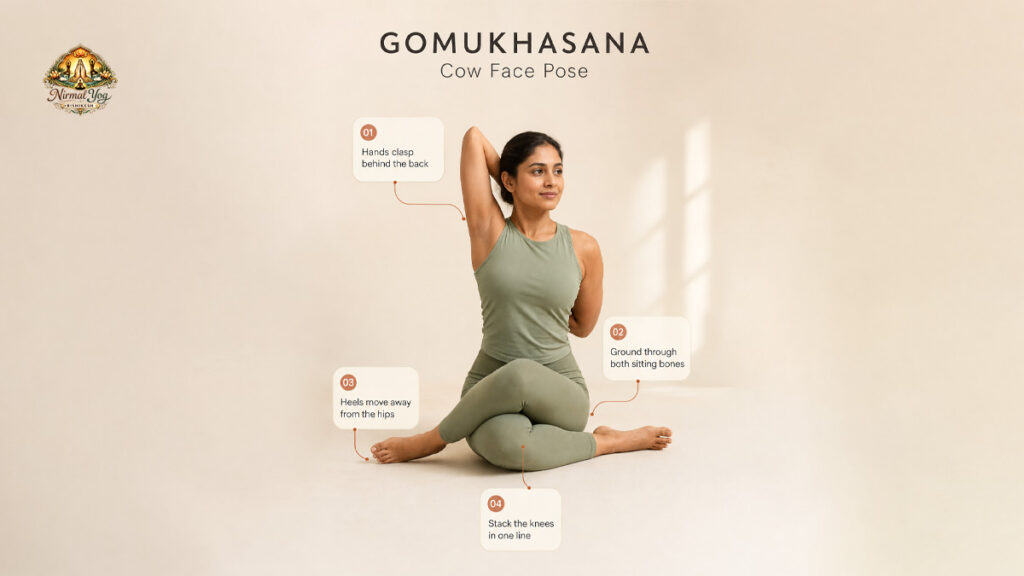
Before getting into the full pose, take your time. If your hips or shoulders are tight, the complete position may not happen immediately. That’s perfectly fine.
Step 1: Set Up Your Legs
Start in Dandasana, sitting with your legs extended in front of you. Bend both knees and bring your feet toward the floor. Slide your left foot underneath your right knee, bringing it toward the outside of your right hip. Now cross your right leg over the left and stack your right knee on top of your left knee. Bring your right foot toward the outside of your left hip. Try to position both heels at a similar distance from the hips. You may need to gently bring the right heel closer to the left hip. Sit evenly on both sitting bones. Avoid leaning to one side just to make the pose look deeper.
Step 2: Position the Lower Arm
Take your left arm out to the side as you inhale. As you exhale, bend the arm and bring the forearm behind your lower back. Continue moving the hand upward, keeping the palm facing outward.
Step 3: Bring the Top Arm Overhead
Inhale and stretch your right arm upward beside your head. As you exhale, bend your right elbow and bring your right hand down behind your right shoulder. If your hands comfortably reach one another, allow the fingers to connect. Don’t worry if they don’t. Reaching for the fingers isn’t the purpose of the pose. Keeping your spine steady and your shoulders relaxed is more important.
Step 4: Find Your Alignment
Bring the right arm behind the head so that your head rests naturally against the inside of the raised arm. Keep your spine upright and your head back without forcing your neck. Try to maintain a calm, steady breath.
Step 5: Hold and Release
Stay in Gomukhasana for around one minute, breathing normally. When you’re ready, slowly release the arms and uncross the legs. Repeat the pose on the opposite side, reversing both the legs and arms. A useful traditional guideline is that the arm on the same side as the top leg is the top arm.
Gomukhasana Benefits
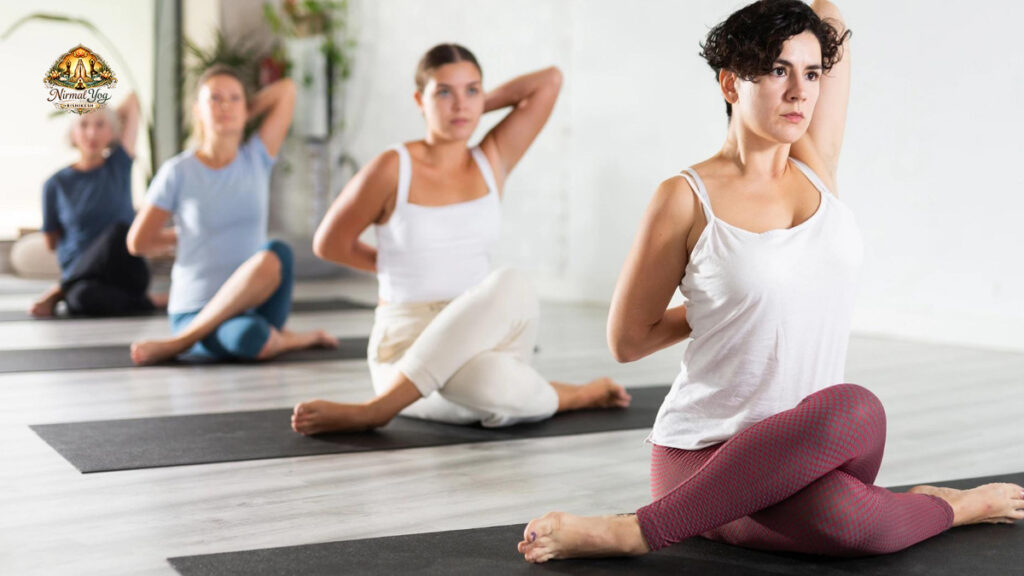
There are several reasons to include Gomukhasana in a regular yoga routine. The pose works on areas where many people naturally hold tension, particularly the hips, shoulders, and upper back. Here are some of the commonly described Gomukhasana benefits:
1. Encourages Relaxation
Gomukhasana is a seated posture, and once you are settled into the pose, the even breathing can help to induce a sense of relaxation. Instead of attempting to go further into the stretch, focus on your breath so that the body can slowly let go of unnecessary tension.
2. Supports Better Posture
Gomukhasana opens the chest and shoulders and assists in preserving an upright spine. If you’re someone who often sits with rounded shoulders, mindfully practicing the pose may help you become more aware of how your upper body is positioned.
3. Opens the Shoulders and Chest
The arm position creates a noticeable stretch around the shoulders and upper chest. This can be particularly useful if you spend much of your day at a computer or on a phone, where the shoulders tend to move forward.
4. Stretches the Hips and Thighs
The crossed-leg position creates a deep stretch around the hips and thighs. With regular, comfortable practice, this can help improve mobility and make the legs feel less stiff.
5. May Help Relieve Everyday Tension
Traditional yoga practice describes Gomukhasana as helpful for tension, tiredness, and anxiety. It is also associated with relieving stiffness around the neck and shoulders. The important point is to practice gently. A yoga posture should not become another source of physical stress.
6. Supports Leg Flexibility
The position works the muscles around the legs and hips. Traditional descriptions of the pose also associate it with relieving leg cramps and making the leg muscles more supple.
A Simple Variation for a Deeper Stretch
Once you’re comfortable in the full pose, there is a variation you can try. From Gomukhasana, exhale and slowly lean forward. Bring your front torso toward the inner upper thigh. Stay there for approximately 20 seconds, then inhale and slowly return to an upright position. Don’t force your torso toward the floor. The forward bend should feel controlled and comfortable.
What to Do After Gomukhasana
Gomukhasana can be followed by several other yoga postures, depending on the focus of your practice. Traditional follow-up asanas include:
- Ardha Matsyendrasana
- Bharadvajasana
- Garudasana
- Marichyasana III
- Padmasana
- Paschimottanasana
- Upavistha Konasana
You don’t necessarily need to perform all of them. Choose movements that complement your practice and help your body transition comfortably.
Precautions and Contraindications
As beneficial as Gomukhasana yoga can be, it isn’t a pose that everyone should perform in its full form. If you have a serious neck or shoulder problem, take particular care with the arm position. Similarly, people with a knee injury should avoid forcing the legs into the crossed position. If your hands don’t meet behind your back, don’t pull or strain your shoulders. If your knees feel uncomfortable, come out of the pose rather than trying to push through the sensation. Yoga should feel challenging at times, but sharp pain is not something to ignore. A qualified yoga teacher can also help you modify the pose according to your mobility and experience.
Final Thoughts
Gomukhasana may look like a complicated posture at first, but its real value is not to achieve the picture-perfect shape. It’s about body awareness and working gently with areas that may feel tight or restricted. It brings the hips, thighs, shoulders, chest, and spine together in one seated position as a cow face pose. Therefore, it is a useful posture to work on flexibility, posture, relaxation, and everyday stiffness with regular and mindful practice. Just start slow, breathe normally, and don’t compare one side of your body to the other. It’s completely normal for one side to feel more open than the other. And remember, you don’t have to force yourself into the deepest version of Gomukhasana to receive the benefits. Sometimes the most helpful practice is just finding a position you can be comfortable in and paying attention to your breath and body.
Frequently Asked Questions – FAQs
Gomukhasana is a yoga seated pose, also called Cow Face Pose. Involves crossing and stacking the legs with the arms behind the back in opposite directions. The pose mainly targets the hips, thighs, shoulders, chest, and knees.
Some of the benefits of Gomukhasana that are often described include relaxation, increased postural awareness, greater flexibility in the hips and thighs, and reduced stiffness and tension around the shoulders and neck. The traditional yoga practice also links the pose to relief from tiredness, anxiety, backache, and general stiffness.
Traditionally, in Gomukhasana, the pose is held for about a minute and then released, and the same is repeated on the other side. If you are a beginner, you can start with a shorter duration and slowly increase it as you get more comfortable with the posture.
Don’t squeeze your hands together. Limited mobility in your shoulders can make this part of the pose difficult. Instead, focus on a comfortable spine and relaxed shoulders. With practice, you might slowly be able to increase the range of motion.
People with serious neck or shoulder problems or a knee injury should avoid the full pose unless they have been advised otherwise by an appropriate healthcare or yoga professional. Never force the knees, shoulders, or neck into a position that causes pain.